How to Make Mead: Wild Fermented Honey Wine
Making mead (fermented honey wine) is an incredibly simple and rewarding process – an elegant partnership that we can foster with the microscopic world of yeasts to yield a product that is an absolute delight to the senses.
It's also a wonderful way to preserve the essence of each season's flowers and fruits as they pass by, to be enjoyed many months or years later while contemplating the passing of time.
Alcohol--specifically, the wild fermentation of fruits and honey--is the result of one of the first partnerships that humans cultivated with microscopic live cultures, many millennia ago, before we had any real knowledge of their existence.
Today we have a better understanding of the billions upon billions of life forms who co-exist on and inside of this body we call our own, and so we recognize the importance of eating in a way that nourishes and replenishes them as well as us.
Raw, unprocessed honey is a powerhouse medicinal food that's loaded with vitamins and minerals. It also contains many yeast spores from flowers visited by the bees who made it, and will spontaneously ferment with even just a little bit of water added to it.
Ignore the modern tropes of über-sterile homebrewing and commercial yeasts – simply cultivate the yeasts that are already naturally occurring in the honey!
Once you get the basics down, there is a whole world of edible flowers, fruits, berries, herbs, and other flavor-enhancing ingredients you can add which will also impart their own unique yeasts to your brew, but the first time around it’s probably best to just focus on the honey.
Note: this post contains affiliate links that will lead you to products on Amazon. If you make a purchase, they give me a small cut. Buying through these links is a great way to support my work at no additional cost to you. I only link to things that I actually use and find worthwhile.
What you’ll need for your initial 1-gallon batch:
2-4 lbs. honey – local is best, but if you must purchase online, this honey is one of the better deals available (you'll need 1 or 2 bottles depending on your preferred sweetness). Some key words to look for: raw, organic, unfiltered, unpasteurized.
(Pasteurized honey, like what you typically find in supermarkets, has gone through an industrial sterilization process to kill off any living organisms, beneficial or otherwise. Complicating matters further, many raw honey producers you may find locally are feeding their bees high-fructose corn syrup! Know your beekeeper, and don't be afraid to ask about their methods and practices.)
- Water – if it’s spring water, purified, or distilled, it’s ready to use. For tap water, it’s a good idea to boil and then cool to room temperature to evaporate any chlorine.
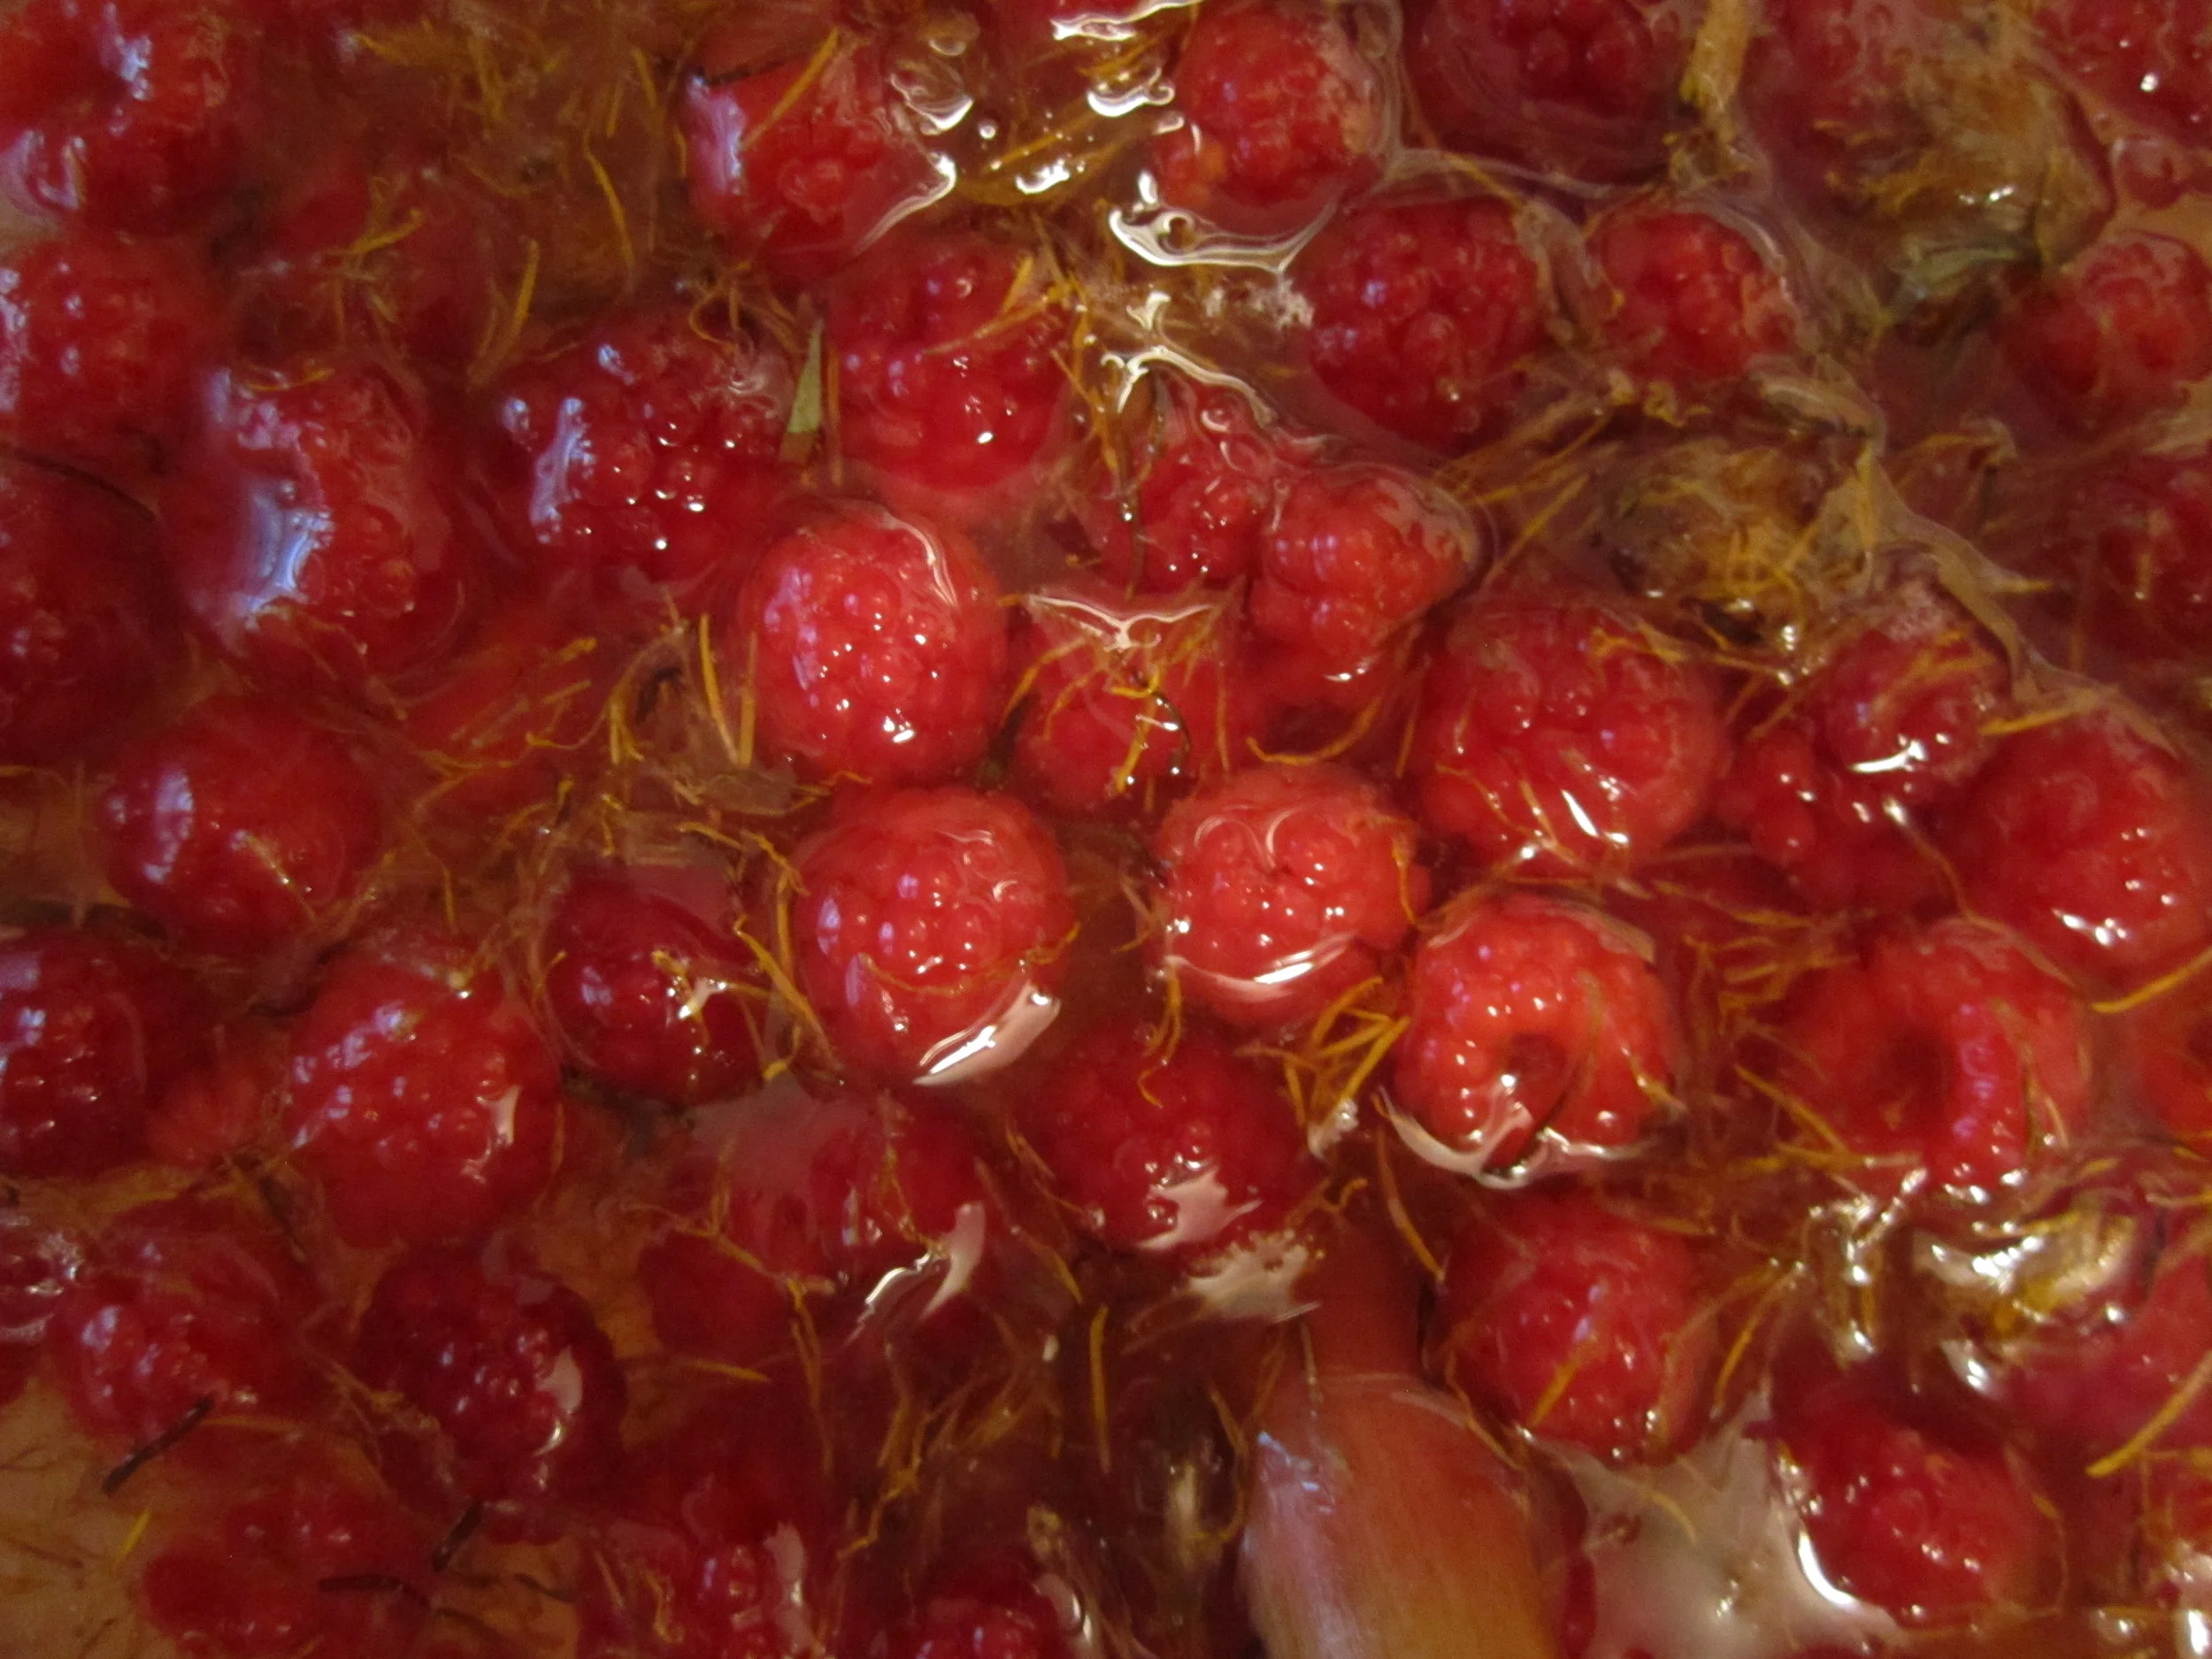
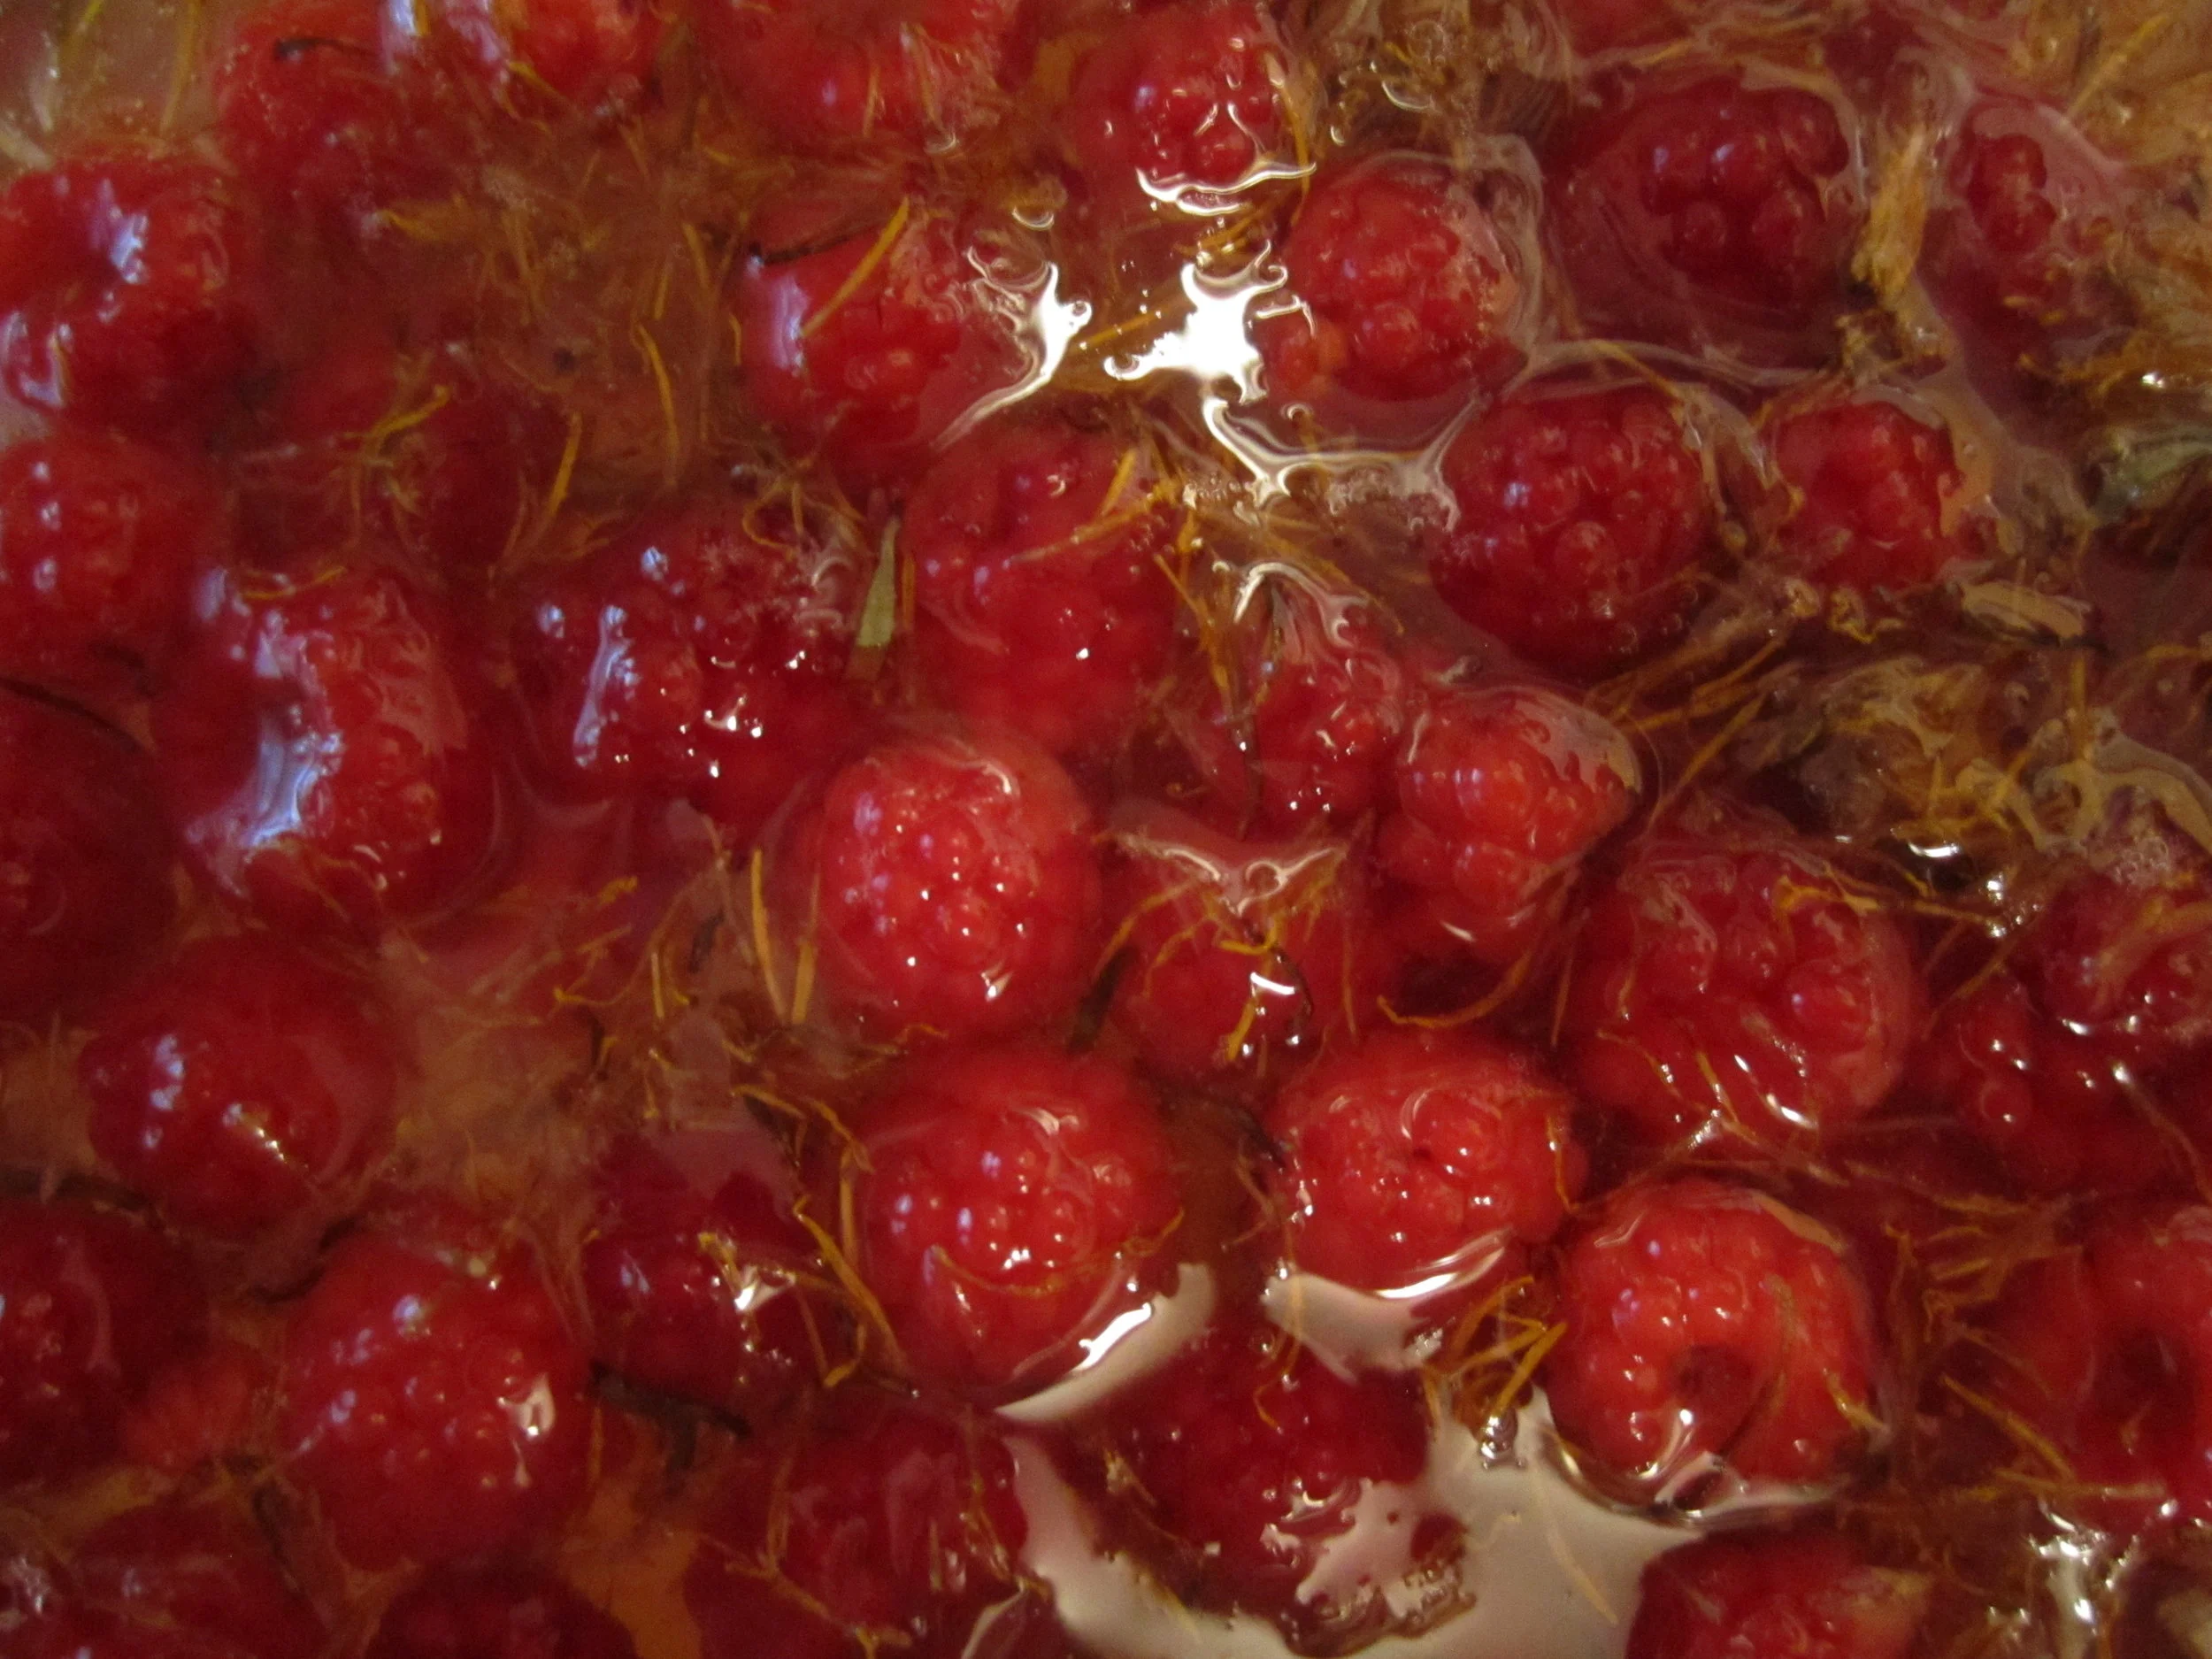
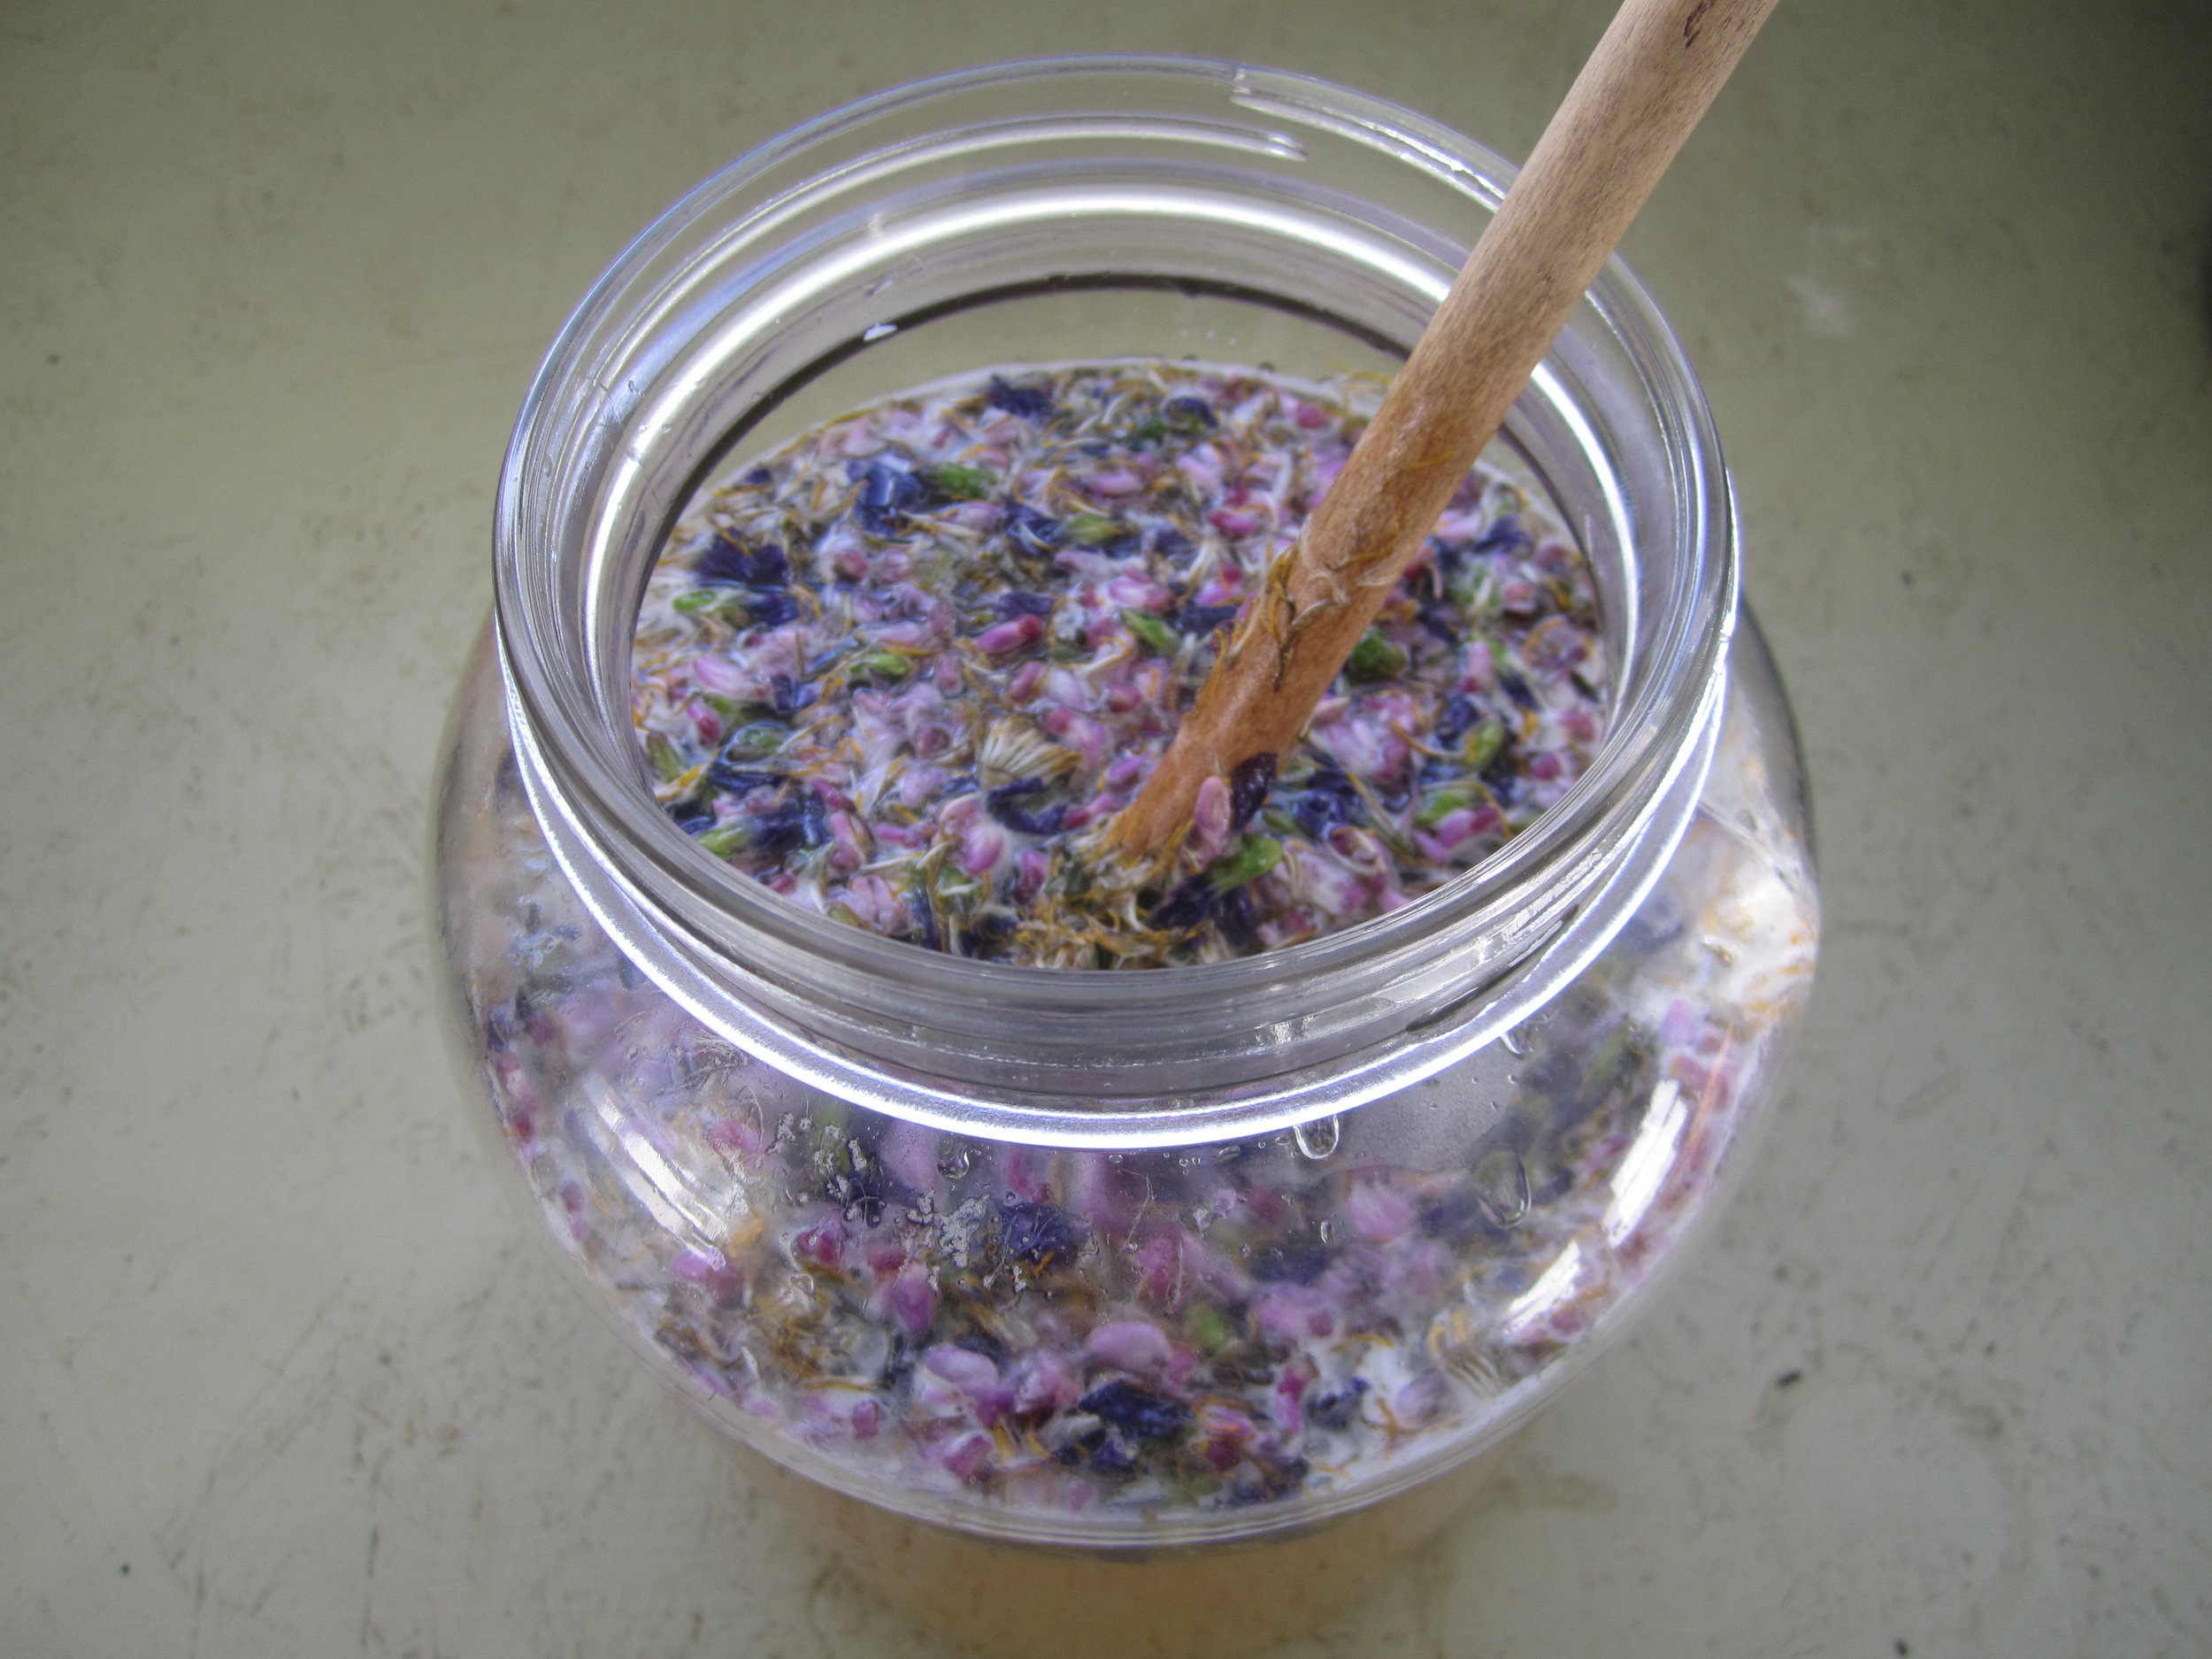
- Berries, edible flowers, etc. – use your imagination! If it’s edible, you can probably ferment it in honey. Don’t wash this stuff (alternately, don’t use it if you don’t feel safe consuming it unwashed!), because it will bring its own wild yeasts to the mix, and that’s a good thing.
- Wide-mouthed glass or ceramic container – you’ll want this to be at least 1-gal or larger. (I use something like this.)
- Cloth – large enough to cover your container with a rubber band or string.
- Wooden spoon – you’ll want to keep this inside your container during the initial fermentation, so make sure it fits and doesn’t sink or stick up.
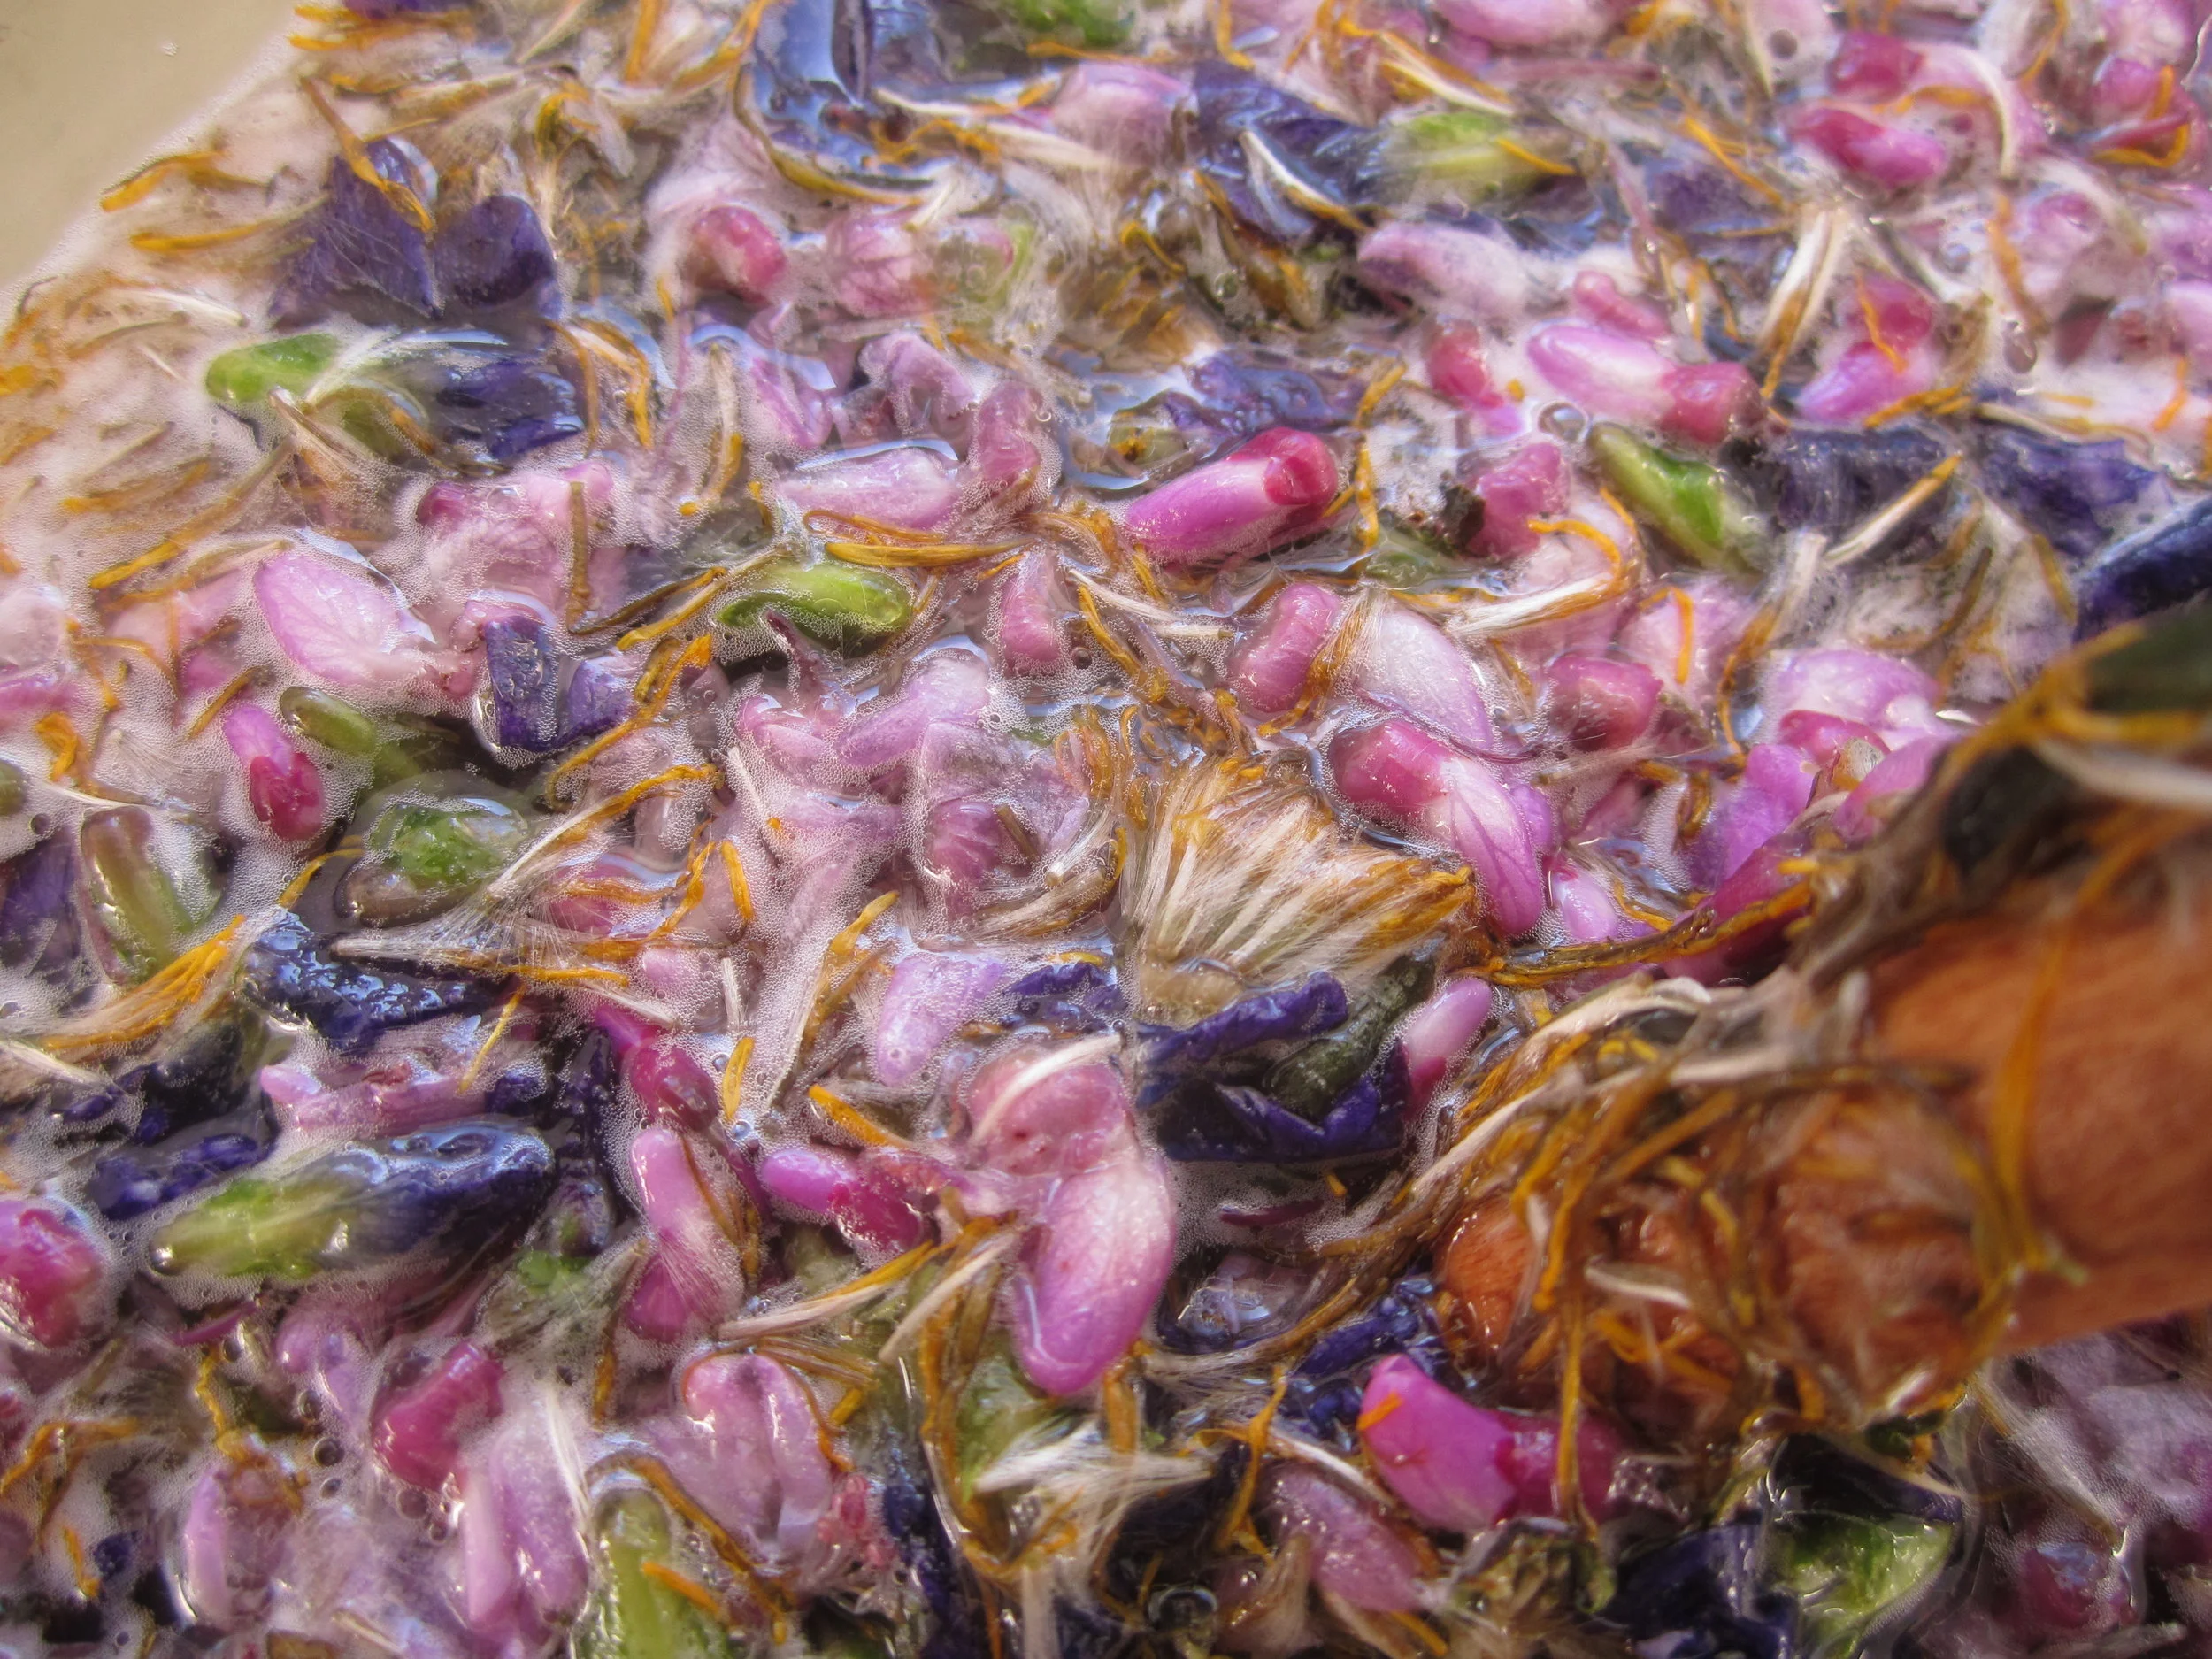
This is an early spring mead fermented with wild violets, dandelions, and redbuds.
How to start a batch of wild fermented mead:
1. Add the honey to your (clean) container.
What is clean? For me, that means rinsing it thoroughly with very hot water before beginning.
2. Add water.
I generally recommend 1 gal. water to 3 lbs. honey for a balanced mead. More honey will lead to a sweeter product, while less will make it more dry.
3. Stir the honey water vigorously for several minutes.
This aerates the wild yeasts and ensures a homogenous mixture.
4. Cover the container with the cloth, and put it somewhere warm and dark.
5. Stir a few times a day for the next week or so.
After a few days, you’ll start to notice some bubbling – the yeast is waking up, consuming the sugars all around it, and multiplying.
6. After a week or two, the bubbling will peak and then mellow out, and the dead yeasts (known as lees) will begin to settle on the bottom of the container.
This means initial fermentation is complete, and now you’ve got options:
a. If you like the way it tastes and don’t want to wait any longer, then stop here and drink it young! This is how mead was consumed for millennia before airtight vessels were an option. The relatively short period of yeast activity means that the sweetness will be high and the alcohol content will be low (maybe 3-4% at most).
b. If you’re interested in taking your mead to the next level, then it’s time to proceed to secondary fermentation in order to prevent souring from continued air contact. In this stage, fermentation will continue at a slower pace, mellowing out the sweetness, bringing out new flavors and increasing the alcohol content.
For secondary fermentation, you’ll need some additional equipment:
- Carboy (Narrow-necked glass jug) – 1-gallon size. You could buy one this like this...
But you don’t really need to buy an empty glass jug – you can usually find organic apple juice/cider in 1-gallon glass jugs at the supermarket for the same price as a new, empty jug.
Airlocks allow gases to escape your carboy while preventing air, flies, ants etc. from entering. Without an airlock, your mead can turn to vinegar, which, while useful in its own right, is probably not your goal here.
- Bung – This is a rubber cork with a drilled hole in the center for inserting an airlock.
For most 1-gal carboys you’ll need size #6.
- Siphon tube – Food-grade tubing for racking (transferring mead to a new vessel).
I would also highly recommend an auto-siphon to go with your tubing. It’s easy to make a sticky sweet mess when racking, but this tool completely eliminates that issue.
How to initiate secondary fermentation of your mead:
1. Siphon your mead into the carboy, being careful to leave the lees behind.
This usually means sacrificing the bottom inch or so of mead to prevent stirring up the bottom. Any dead yeast you transfer over to the new vessel will break down and can give the mead an off flavor.
2. Add water and honey in the same proportions as before to fill your carboy up towards the bottom of the neck.
The purpose of the narrow neck is to minimize the surface area of liquid exposed to oxygen in the air, but you do need to leave some space behind for gases that accumulate during fermentation.
3. Fill your airlock with water as directed, insert it into the bung, and insert the bung into your carboy.
Store it somewhere warm and dark, as before. Congratulations! Now you get to wait.
4. Leave the mead alone for at least a few weeks, if not months.
If you start to notice a lot of lees building up on the bottom, you may want to rack it again to prevent them from souring it. Otherwise, leave it in the carboy for at least six months, but up to a year if you can stand it. Don’t be afraid to taste it periodically, and again, if you really like the way it tastes and don’t want to wait any longer, then don’t! Drink up, and feel proud of your achievement!
5. Bottle the mead to further age it if you have a will of steel and have managed not to drink it after six months or so.
Don’t make the mistake that everyone makes – don’t bottle too soon! Your bottles will blow up and it will be awful and you will feel so terrible and frustrated when you have to clean up a sour, sticky mess of glass shards. Don’t do it! Be patient. If your airlock shows any signs of bubbling once per minute, it’s still too soon.
I like Grölsch-style swing-top bottles because they’re easy to reuse and don’t require any bottling equipment to use.
Let the mead age in the bottles for another few months, or even years if you can, but try one after a few weeks to see how it’s coming along and whether they might have too much carbonation developing. Nobody likes exploding glass bottles!
Experimenting with mead recipes
Every seasoned mead maker has their favorite ingredients to add to a brew. Ask your local beekeeper what s/he recommends!
Jereme Zimmerman, author of Make Mead Like a Viking, recommends adding a handful of raisins for yeast, nutrients, and tannins, as well as tree bark or black tea for their tannins as well.
I’ve gotten in the habit of adding dandelions (petals only – green parts will make it bitter) to all of my meads. Their mellow, floral sweetness seems to balance out the tartness of the berries that I typically use. But the sky’s the limit when it comes to flavor-enhancing ingredients, so be creative!
By making mead using raw honey mixed with locally grown – or better yet, locally foraged – fruits, berries, flowers, and herbs through the growing season, we give ourselves another way to preserve the harvest and enjoy the sweetness of spring and summer all through the winter, and for years to come.
More than that, we preserve the longstanding tradition of cultivating living organisms like yeast, and working with them to produce foods that nourish our souls and our gut flora. We empower ourselves to take our health and wellness into our own hands, and foster community bonds by sharing our fermented foods and recipes. I believe I'll have another round!
Sources:
- Jereme Zimmerman. Make Mead Like a Viking, 2015.
- Sandor Katz. The Art of Fermentation, 2012.
